
EXADS RTB for Advertisers
This documentation explains how advertisers can integrate their platforms with EXADS.
Bid Request/Response Specifications
Requirements
- We allow one bid per request only.
- Supported pricing models:
- Banner, Popunder Ads: CPM.
- Push Notification Ads: CPM or CPC.*
- The currency of the bid price will be the currency of your EXADS account (EUR or USD).
- The advertiser will need to provide a valid RTB URL, this can have any GET params that might be needed by the endpoint and must be able to receive our bid either through GET or POST.
* Pricing model to be defined in bid response.
Supported ad types
- Banner: Image
- Direct Link
- Email Clicks
- Popunder
- Push Notifications: 720 x 480 and 192 x 192
Integrating Advertising Demand from an EXADS-Powered Network
In this step-by-step guide, we will explain how to integrate advertising demand with a partner from another network that is powered by EXADS.
Step 1: Setting up an account
Create an Advertiser account on your network, and share the login credentials with your partner. You should enable RTB for this new account (in the Admin configuration).
Step 2: Sharing the sites
Share each of the sites and ad placements you have available with your partner, and they will provide you an endpoint for each of the campaigns.
Depending on how many sites there are, it might be easiest to share a spreadsheet with them listing all domains and endpoints. For example:
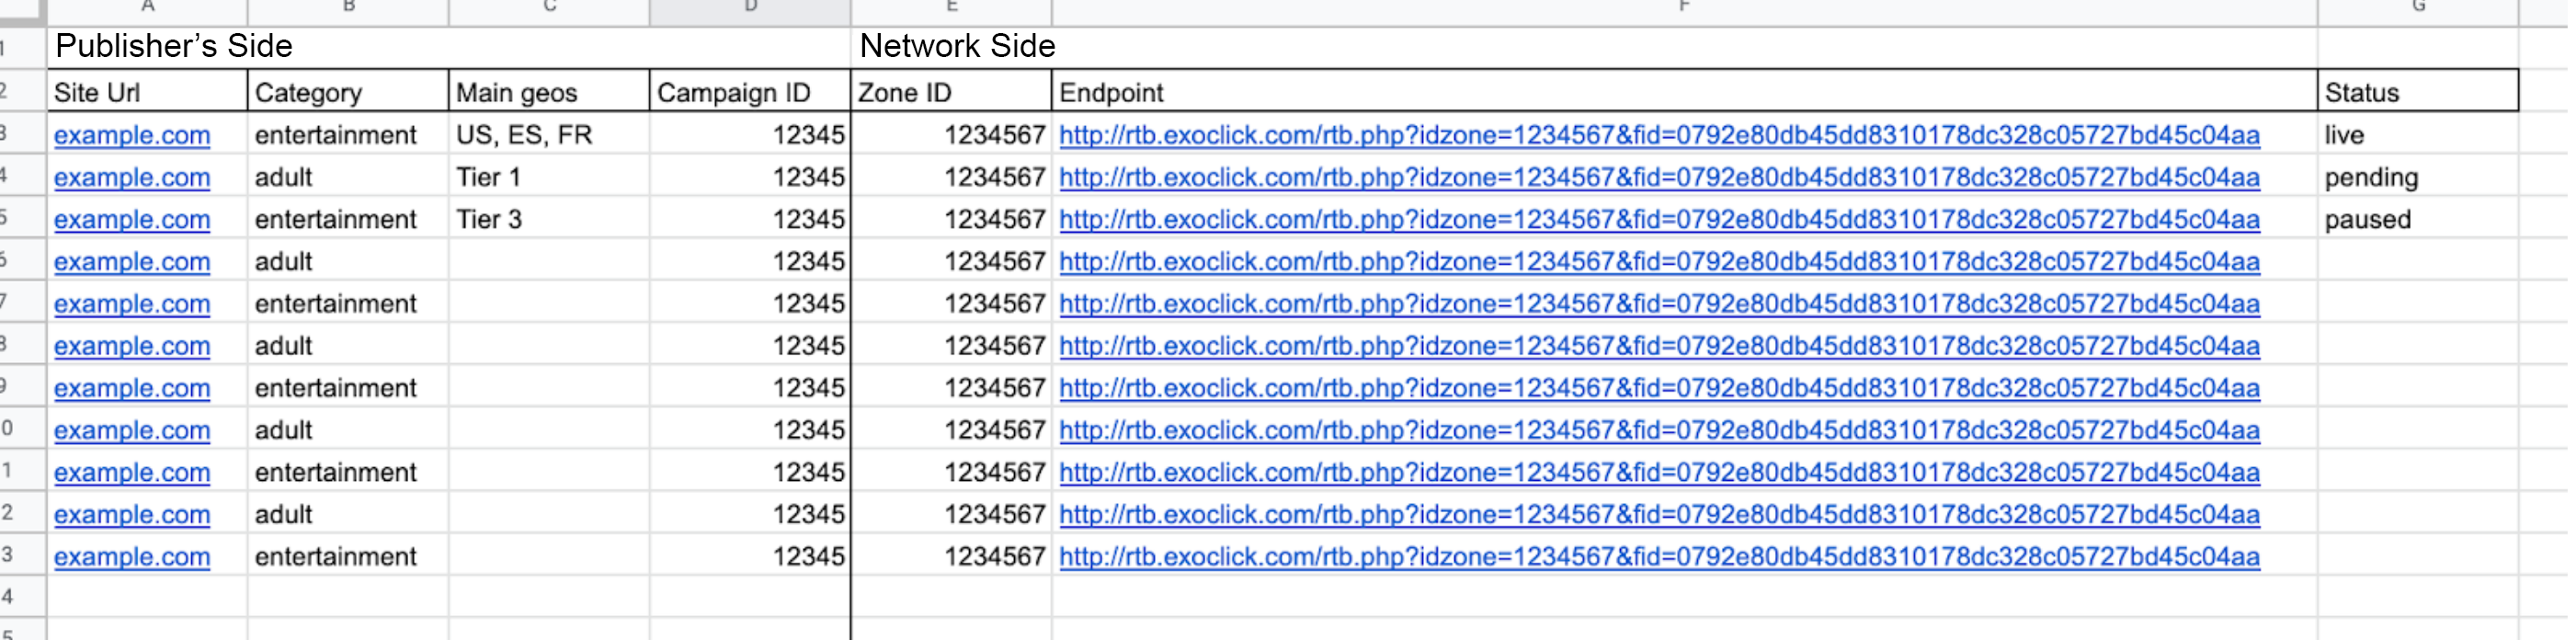
Once you have shared the sites, you should then move on to create one campaign for each of the endpoints.
Step 3: Creating campaigns
Set up separate campaigns for each ad zone, by clicking on Create Campaign in the Admin Panel and proceeding through the five tabs for each one.
General
In this tab add the general details for the campaign:
- Name: Give the campaign a name that will be easy to identify later, such as Site name-Ad Zone name.
- Ad Group: None. Or if you wish, you can create an ad group for each site, depending on the volume of sites you manage.
- Categories: Select All, unless you have agreed otherwise with your partner.
- Ad Format: Select the format that corresponds to the ad zone.
- Campaign Type: Exchange.
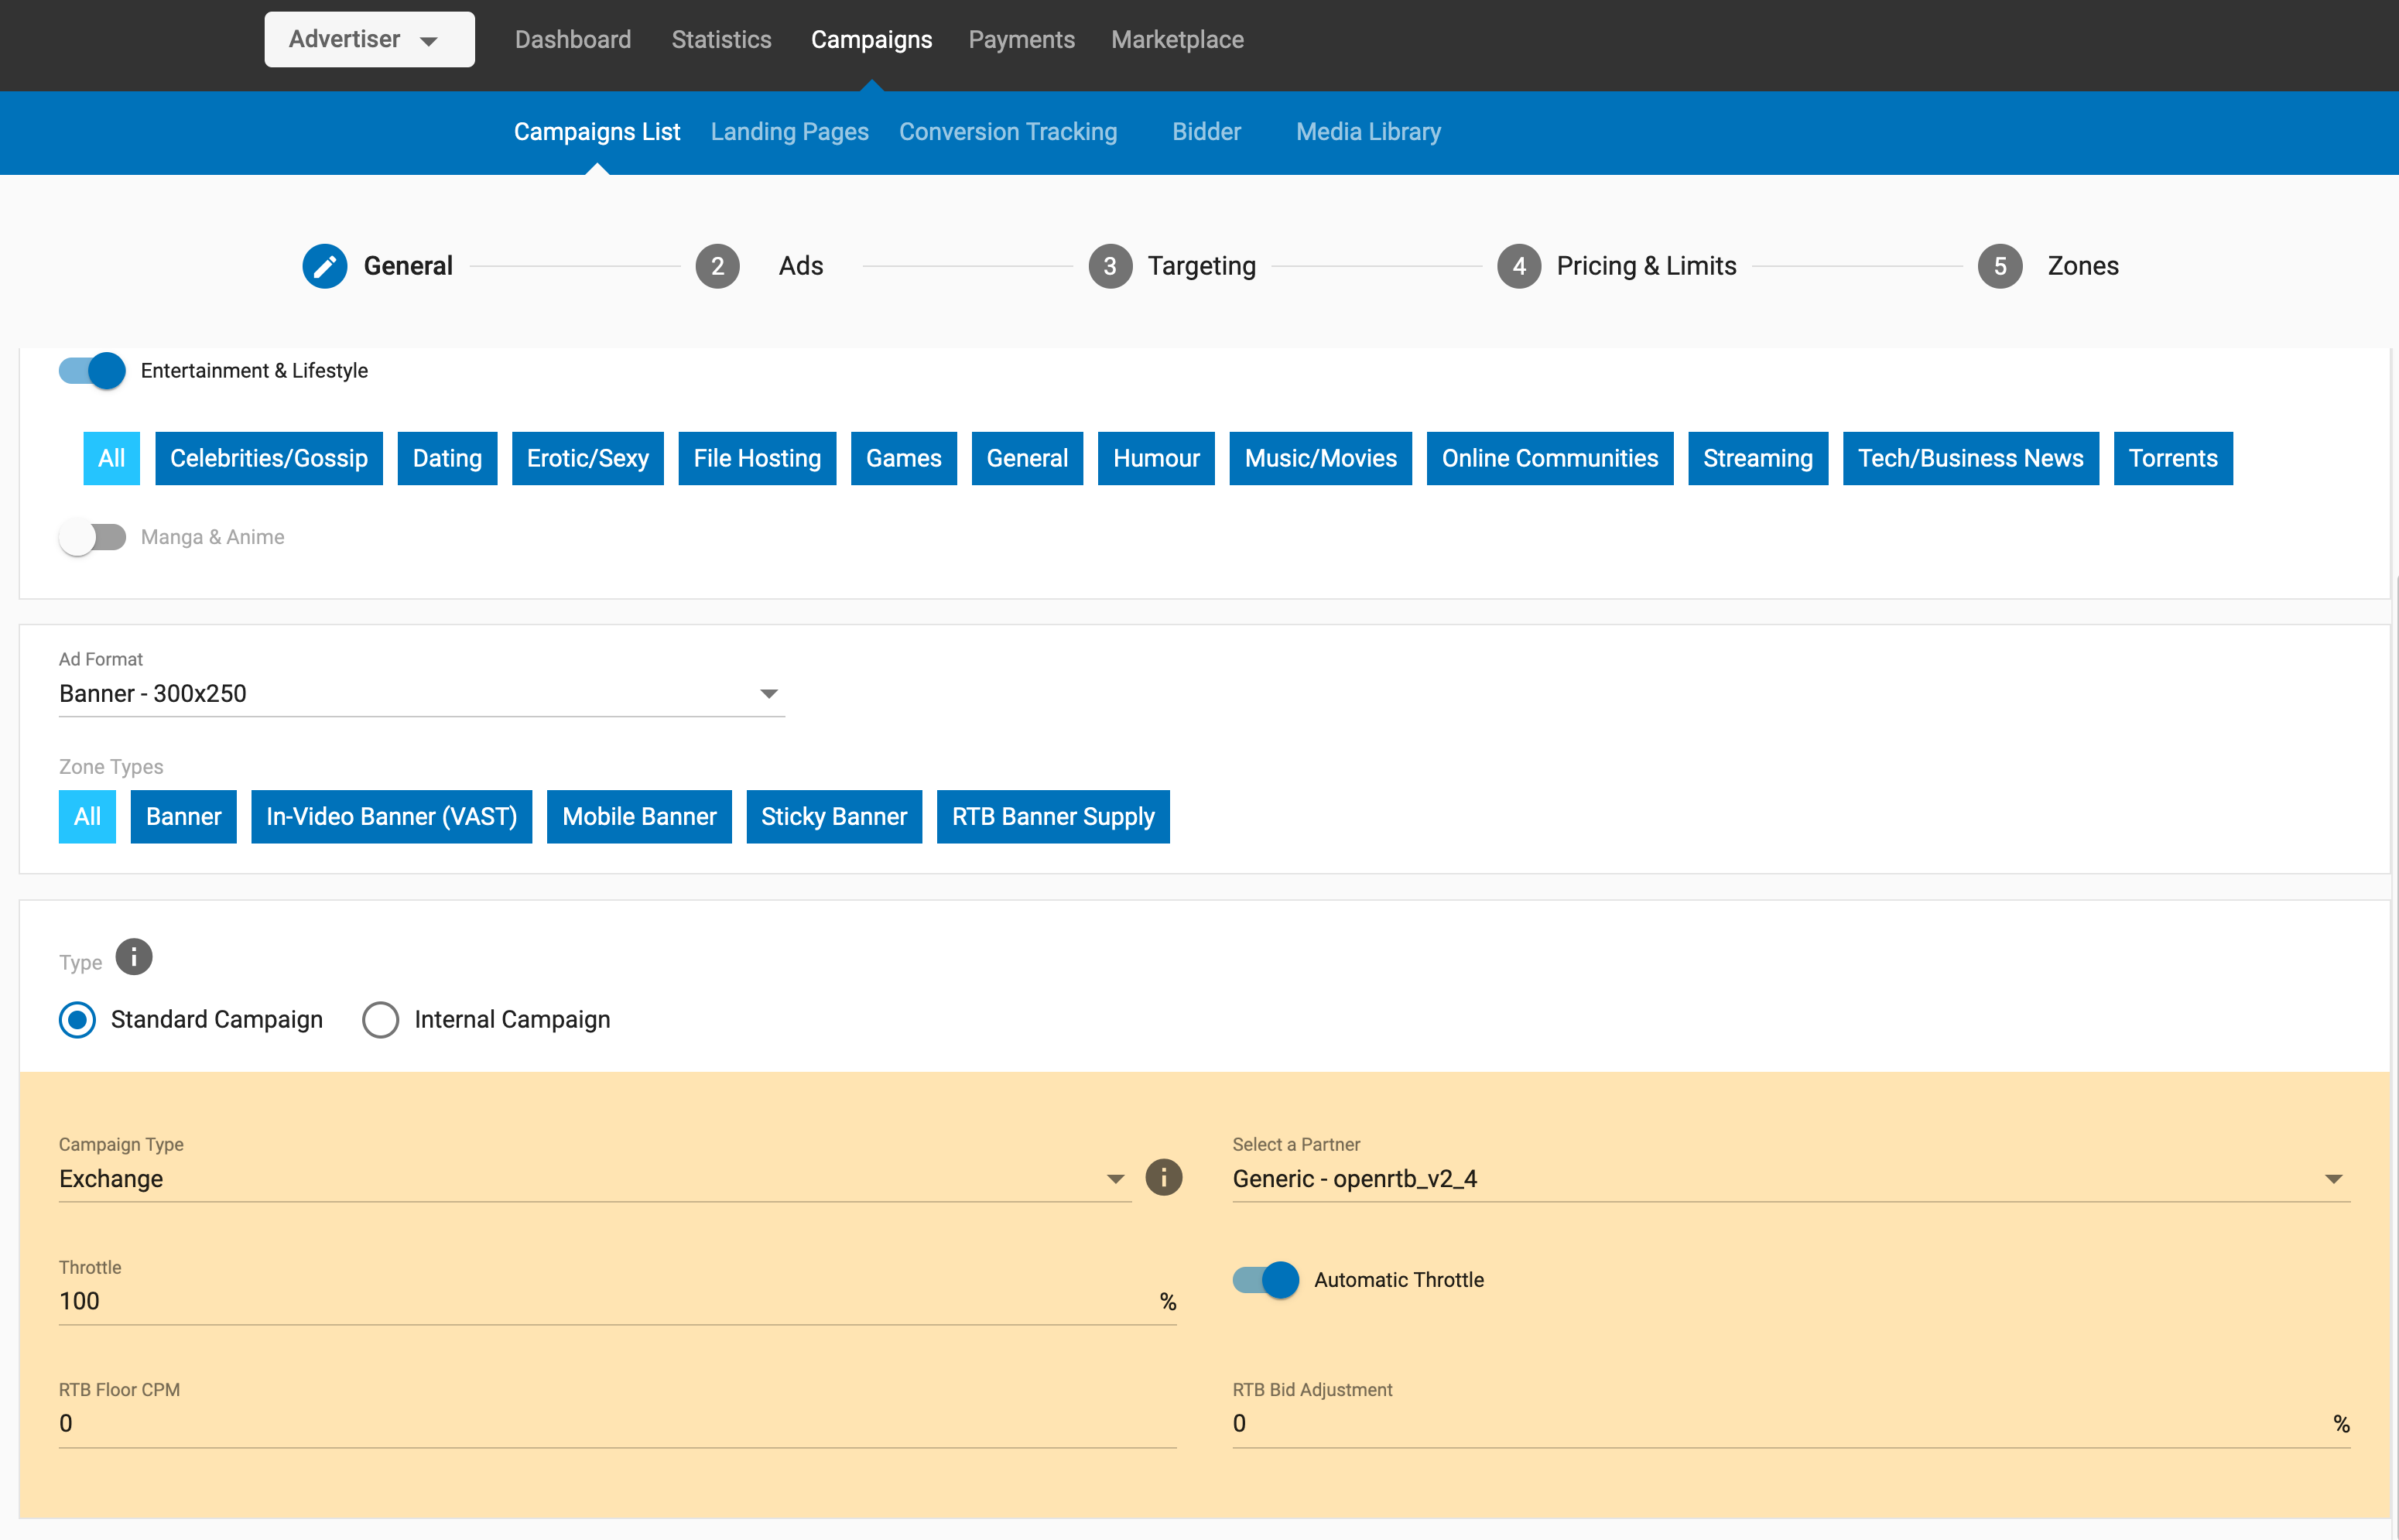
- Select a Partner:
- OpenRTB v2.4: For clients that support OpenRTB integration.
- EXADS RTB: For clients that support EXADS RTB integration.
- The specific Ad Exchange Partner name if it has been configured on your network.
- Throttle: Set this to 100, unless you have agreed otherwise with your partner or you are in a test phase.
- RTB Automatic Throttle: Set this to ON to save resources and costs.
- RTB Floor CPM: Use the Floor CPM only if you have agreed to with your partner.
- RTB Bid adjustment: Set to 0%. Use this only as a last resort if you have agreed with your partner that it's necessary. This might happen if there are extremely high discrepancies, which will probably not happen.
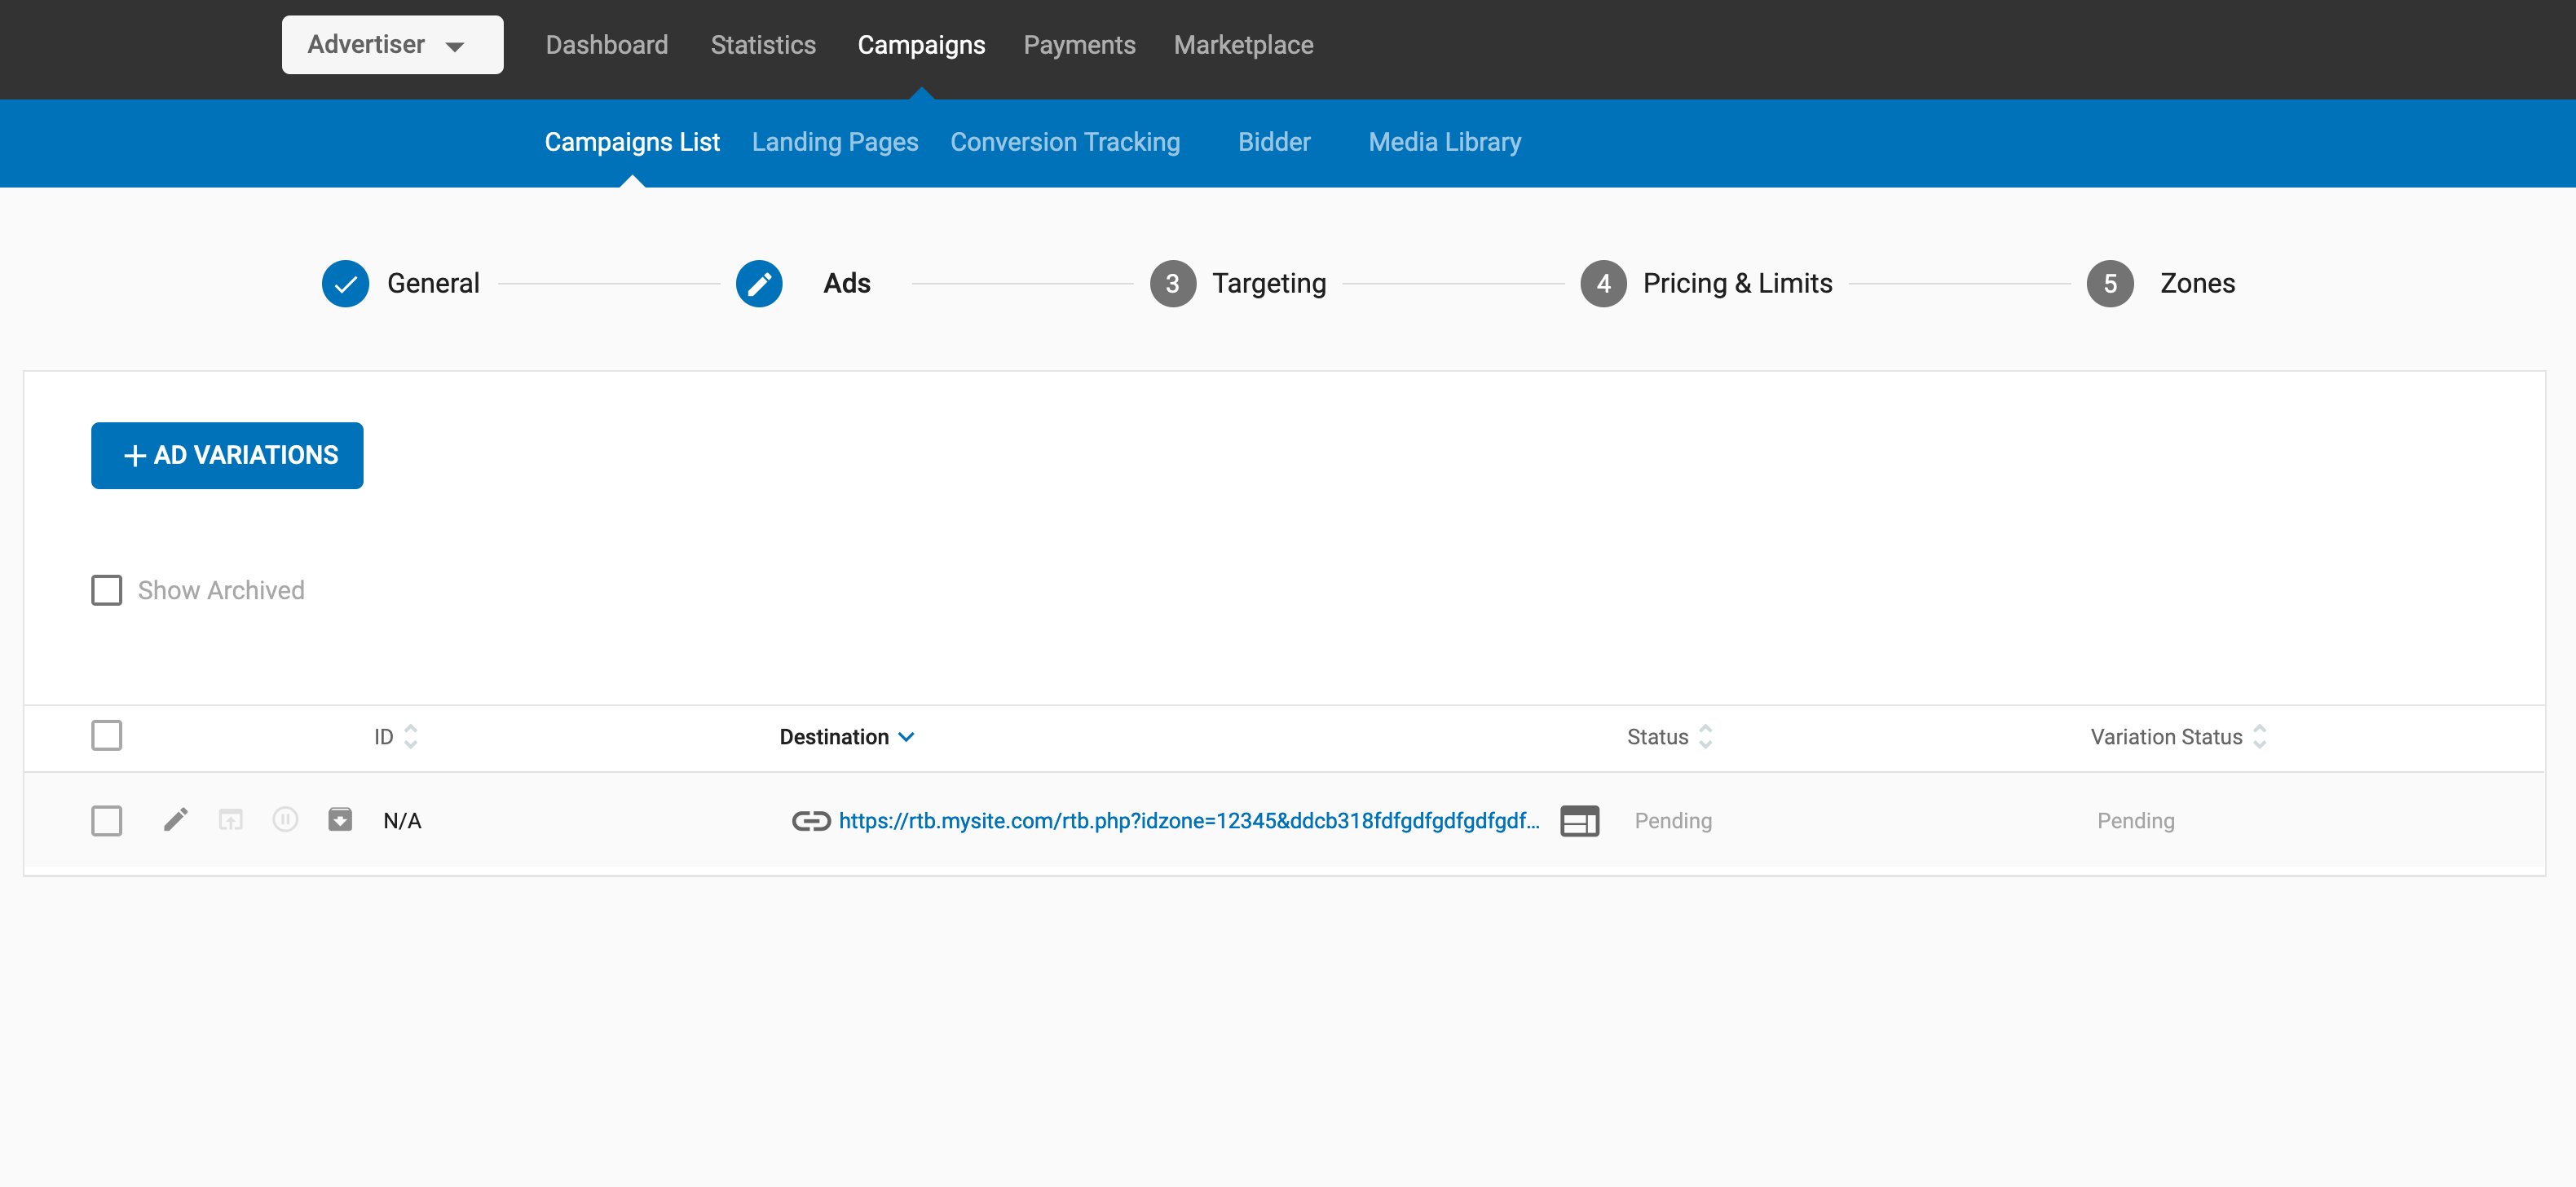
Ads
In this tab add the endpoint provided by your partner (there is no need to add any parameters).
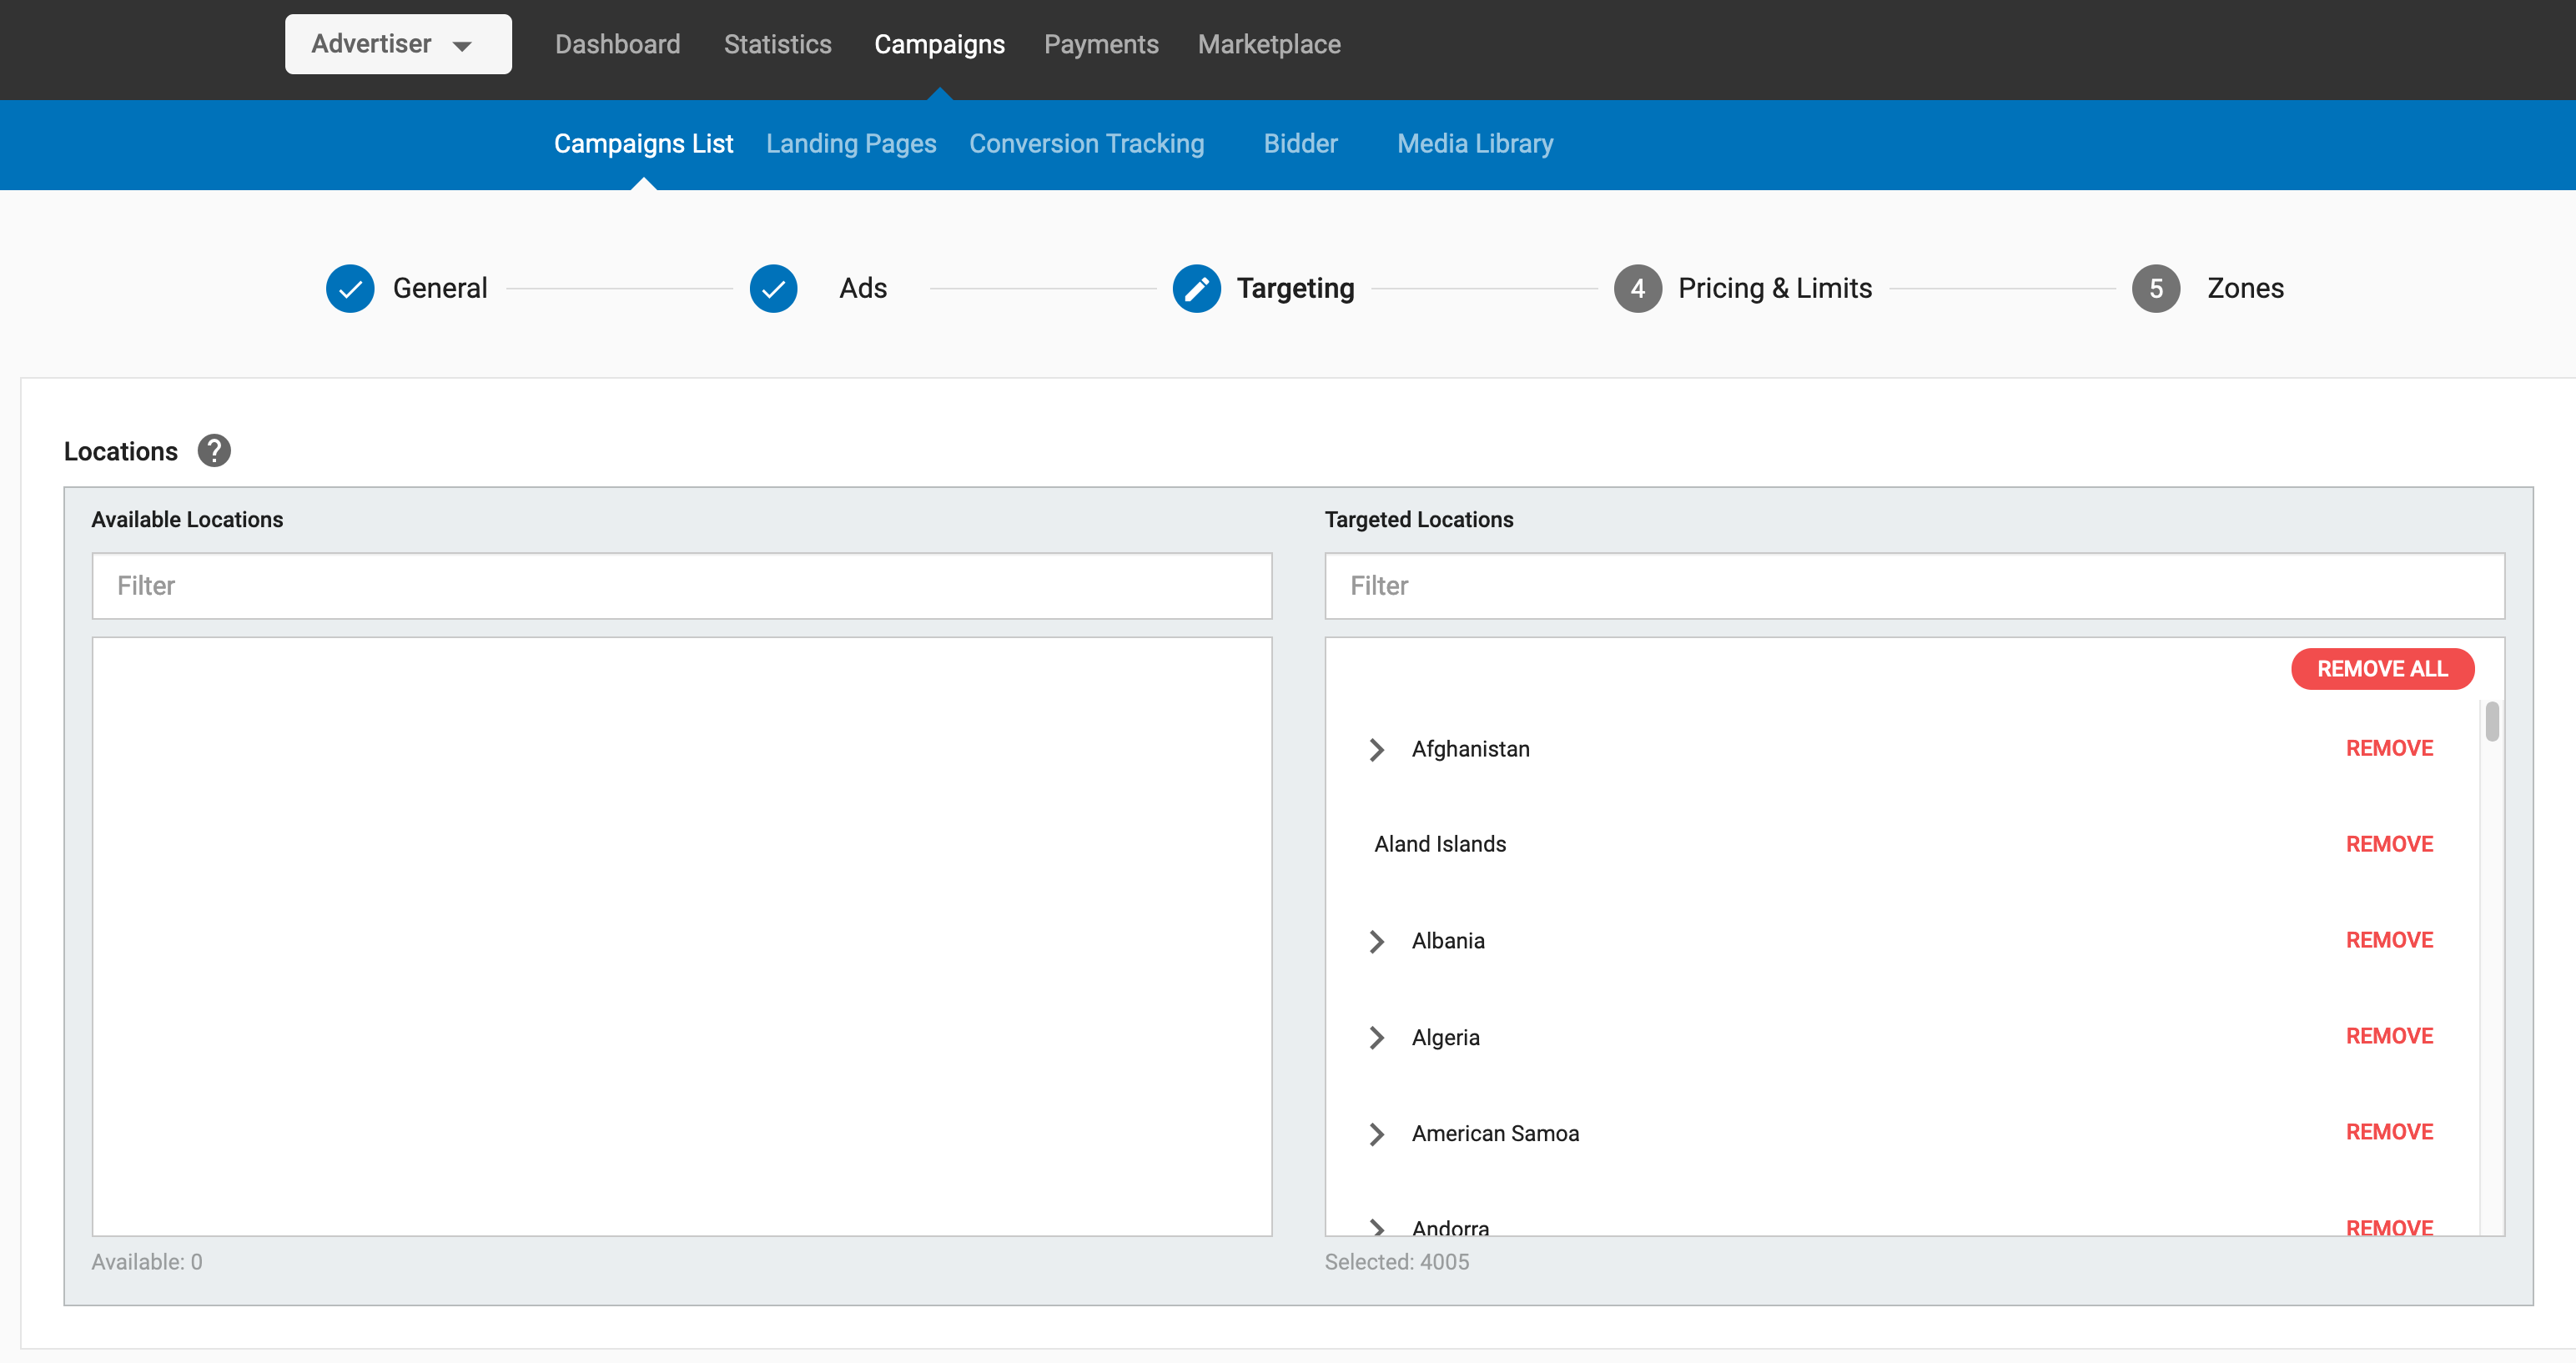
Targeting
In this tab, select all countries and leave all other targeting options as selected by default, unless you have agreed otherwise with your partner.
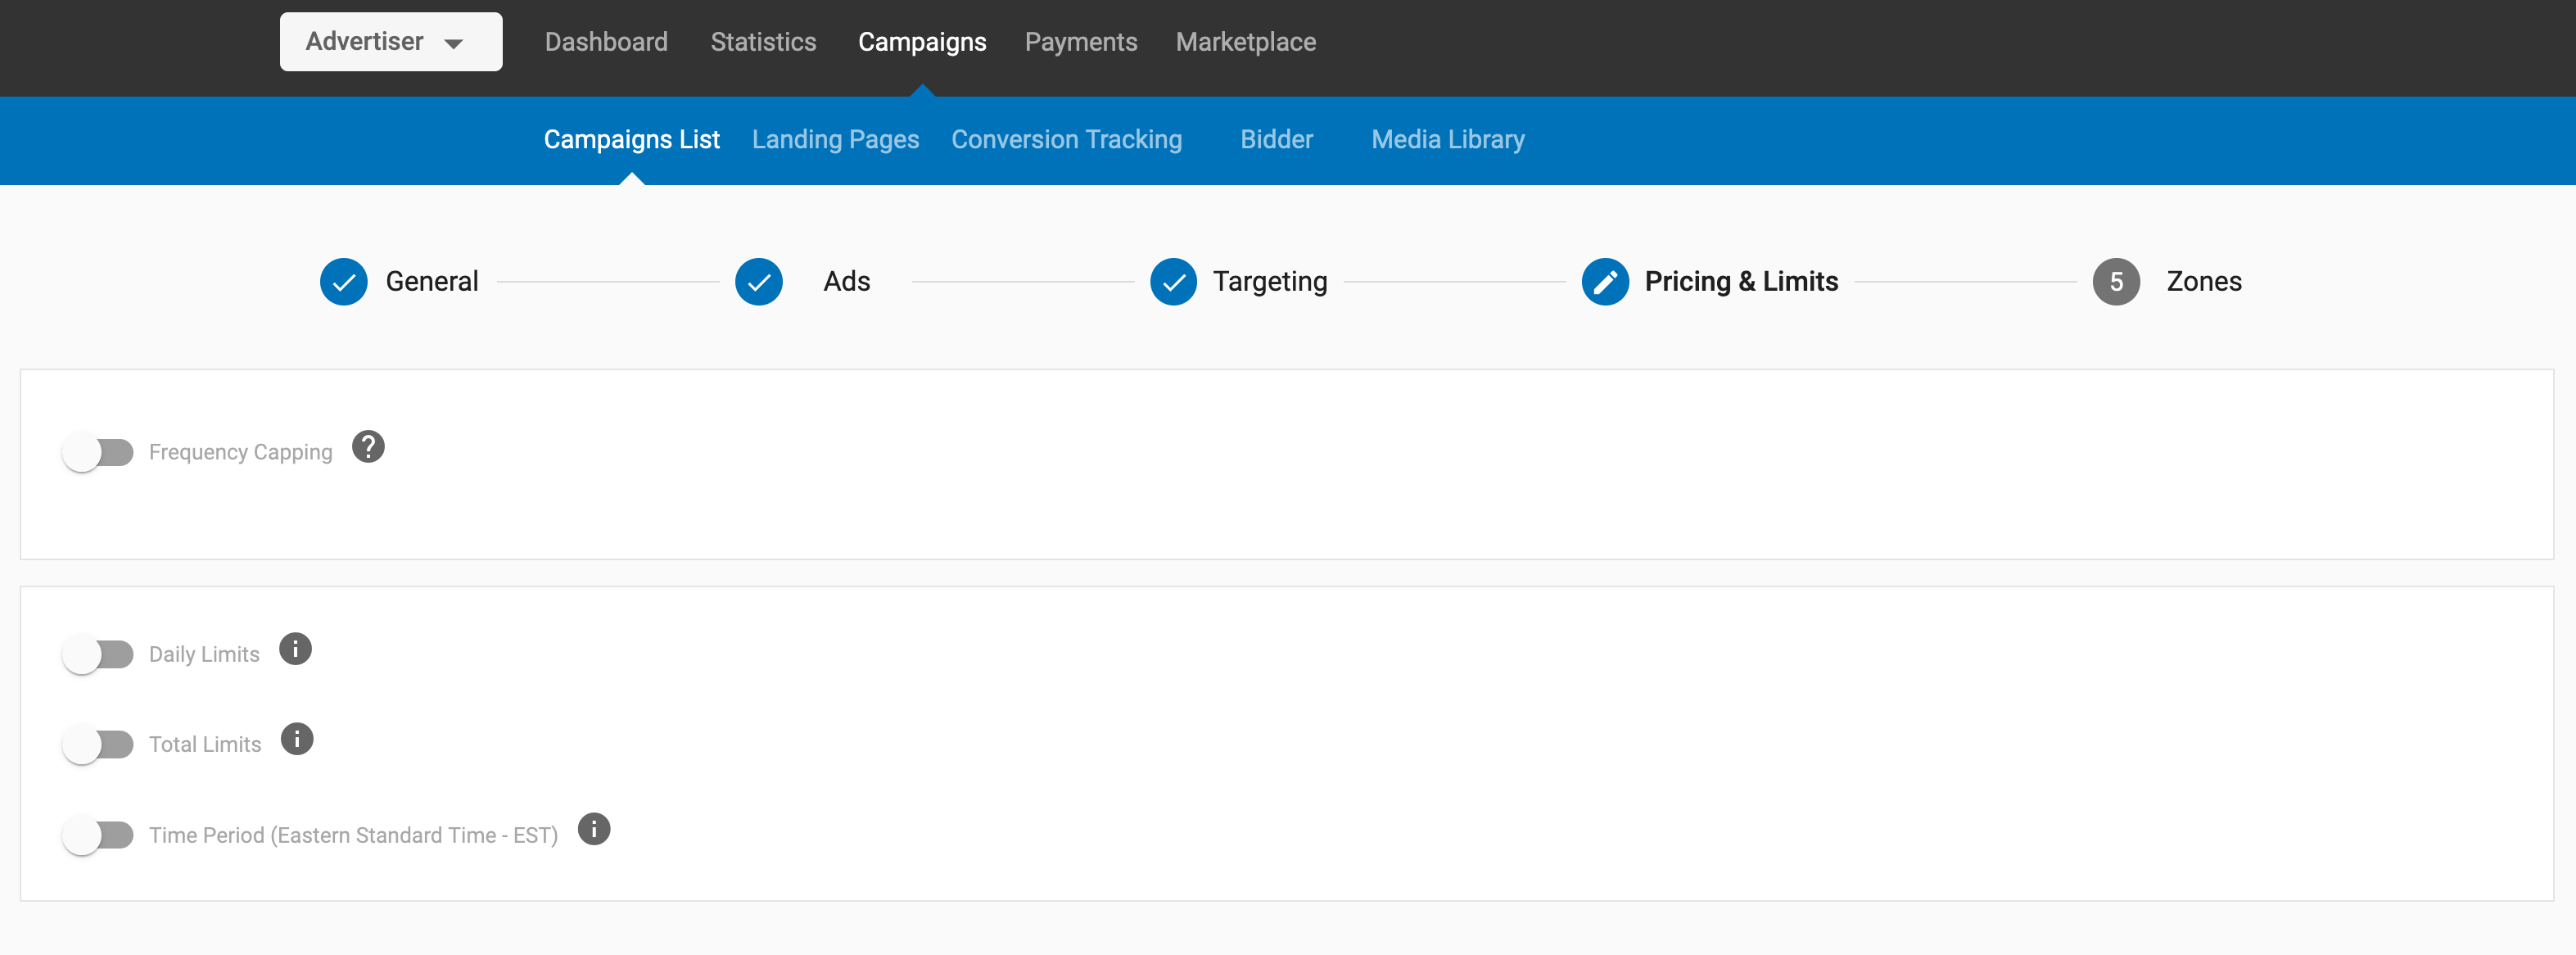
Pricing & Limits
In this tab, leave the default settings, unless you have agreed otherwise with your partner.
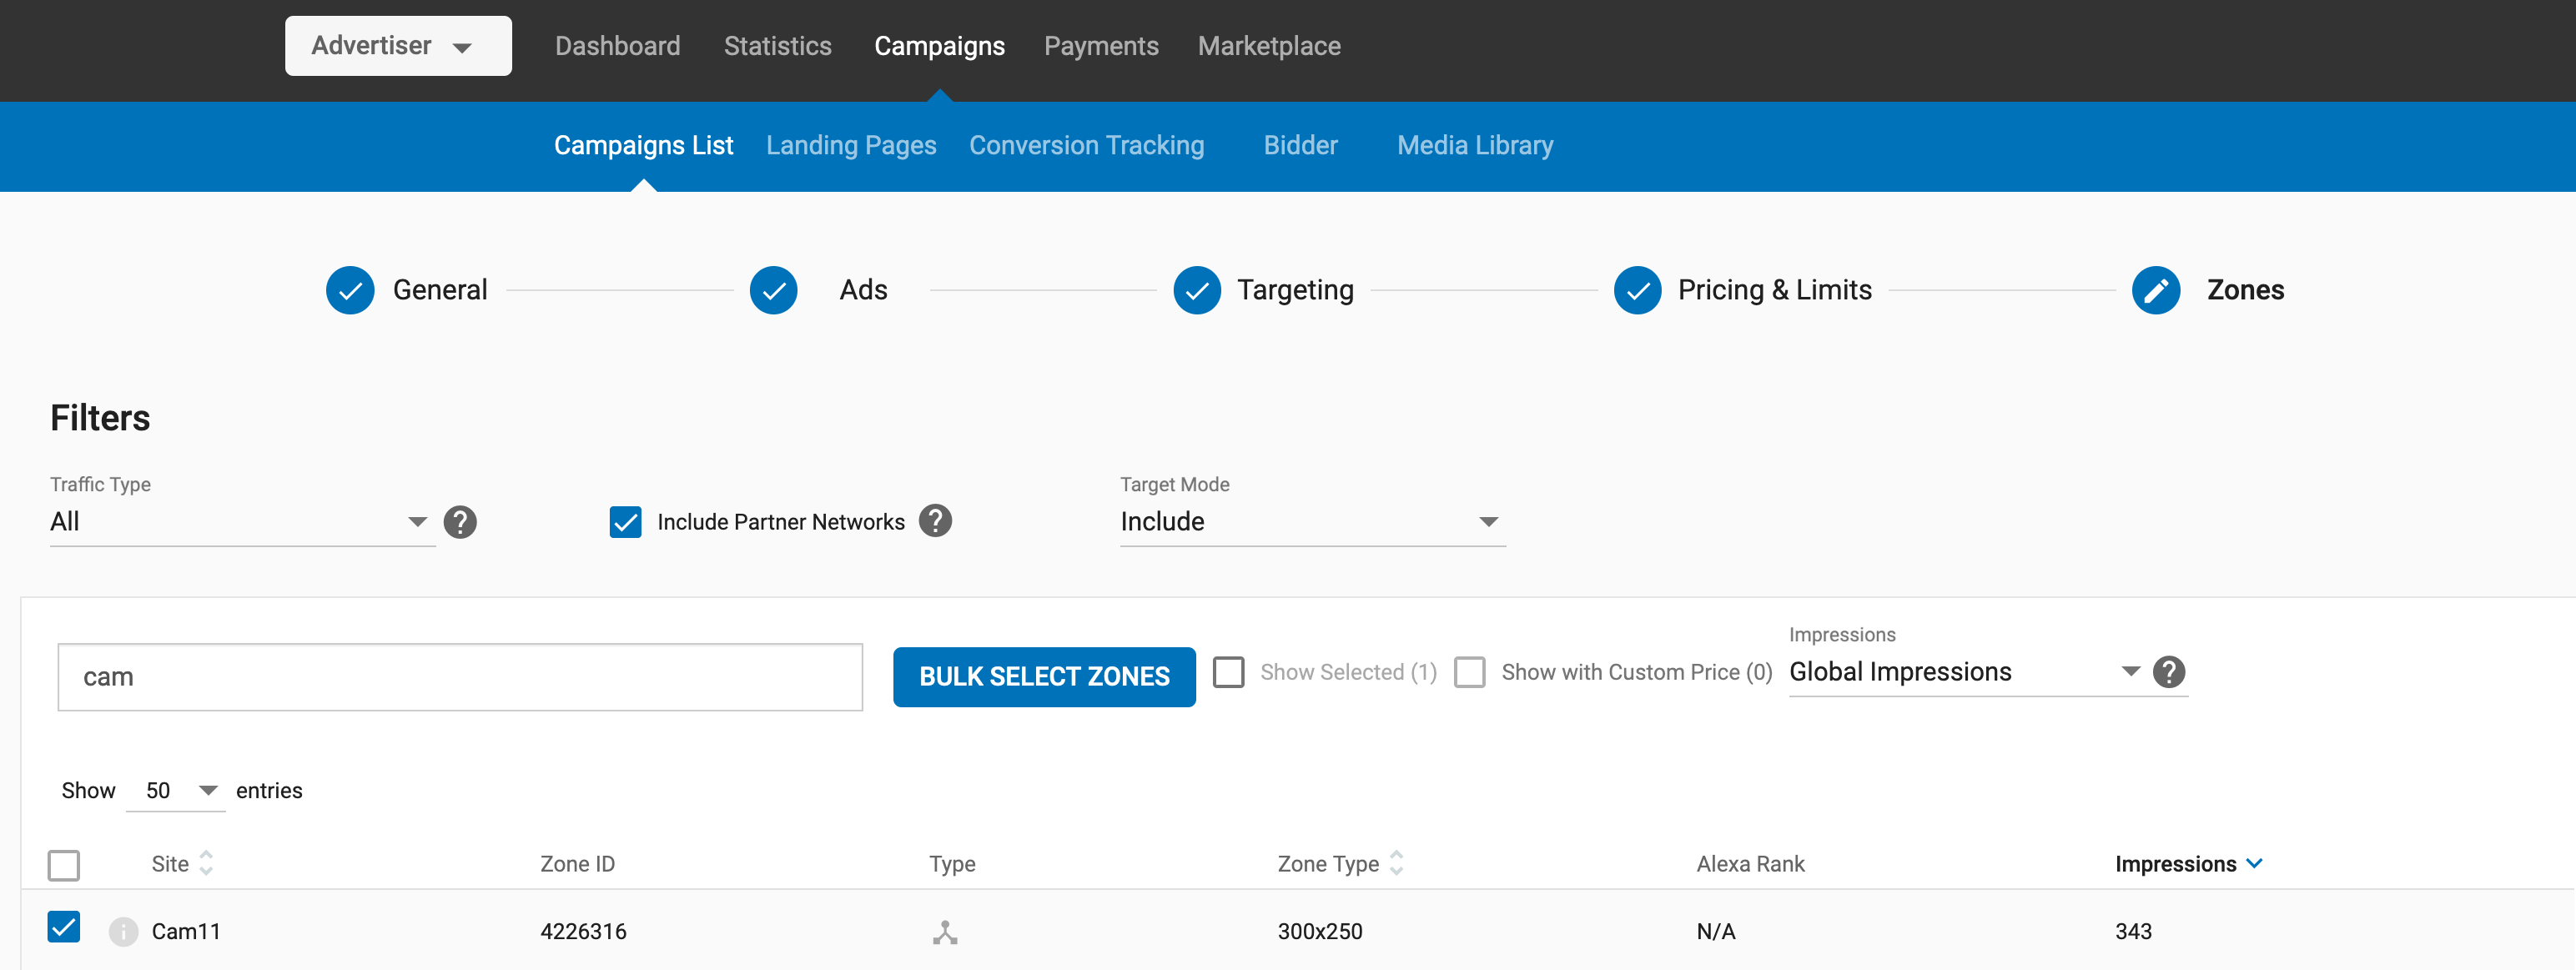
Zones
In this tab, select only the zone that matches with the URL for the endpoint that your partner provided. If you agreed on a RON campaign, you can either select all the available zones or choose the ones you want to add/remove from the list.
Step 4: Activating campaigns
Once you have created a campaign, you need to activate it: First, open the traffic with a low amount of QPS (Queries per second), so you can test if everything works well (this should be managed using the campaign throttle).
Step 5: Checking your campaign
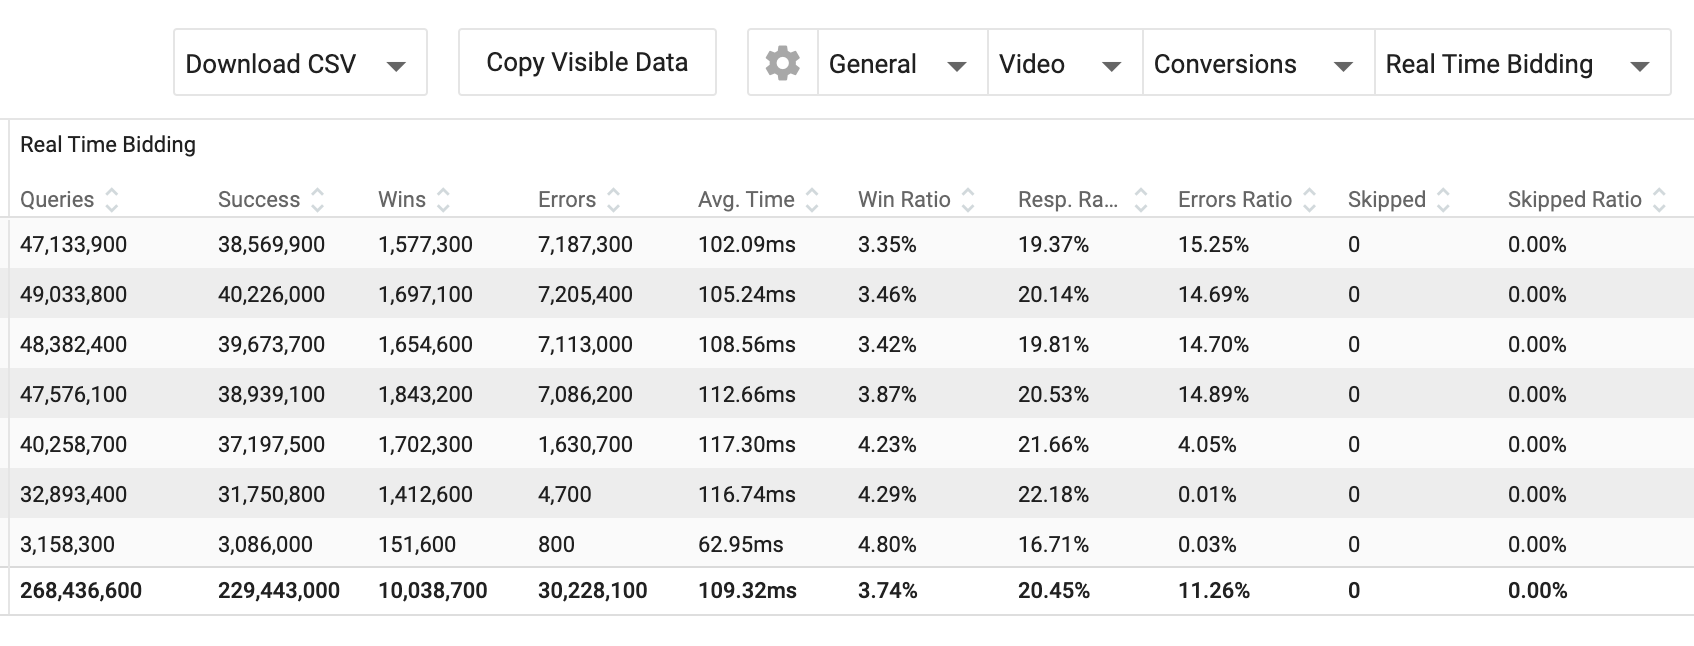
Once you activate the campaign, you should see the following data appearing in the Statistics tab. Check it to make sure that everything is working fine:
Queries and Success queries: If you see Queries but don't see Success queries, then you need to focus on the Errors and Error Ratio columns. If errors appear, you should compare and confirm that your partner's integration is aligned with yours, and test/debug it using Postman. The Avg Time can also give some further information.
Response Ratio/No Bid Ratio: This shows whether bids occur or not.
Win Ratio: This data is linked to the nUrl parameter. If wins don’t appear, you should check if this nUrl is provided and returned correctly.
Impressions/Clicks: If the integration is successful, there will be no errors here and there should be bids and wins happening. If there are, you will see impressions here. This is what you will bill and be billed for. Depending on the format you may see Clicks as well.
CPM/CPC: Depending on the format and the payment model, you will see CPM and/or CPC.
Step 6: Adding more campaigns
Once you have checked the campaign, keep adding campaigns and use the spreadsheet to coordinate the endpoints with your partner.
Best Practices
- One of the simplest and most effective ways of improving connection performance is to enable HTTP Persistent Connections, also known as 'Keep-Alive'. This has a profound impact on overall performance by reducing connection management overhead as well as CPU utilization on both sides of the interface.
- The EXADS RTB specifications do not cover security other than recommending plain HTTP for performance reasons. If you need to authorize EXADS JSON/XML requests, you may whitelist IP Networks.